Can You Do 2d Cad Drawings in Fusion
Normally when using a CAD modeling software, design is made from 2D sketches to 3D objects by extruding.In this tutorial, you will learn how we create 3D objects with laser cutting thanks to assembly.
To create our laser cutting files, we will use the sketches of our CAD file and a plugin in Fusion 360 to obtain DXF files of a box that you will be able to upload on Sculpteo's platform.
To obtain the plugin, go in the Fusion360 Appstore and downloadDXF for Laser Cutting. Once you've installed it, you'll find the plugin under theSketch menu. It allows you to export your sketches into DXF and to take the kerf into account at the same time.
Modeling the box with sketches
Let's start by creating a sketch for the base of the box.
If you are going to design an object with multiple drawings, it is important to rename each sketch carefully.
Create a square shape of100 mm of width and extrude it of the thickness of your material. Then, create one of the sides of the box by creating a sketch directly on the side of the base of the box. If you want to create joint features, use theline tool to sketch on your face. Then, use theintersect boolean operation to obtain the cut side of the box with your joints.
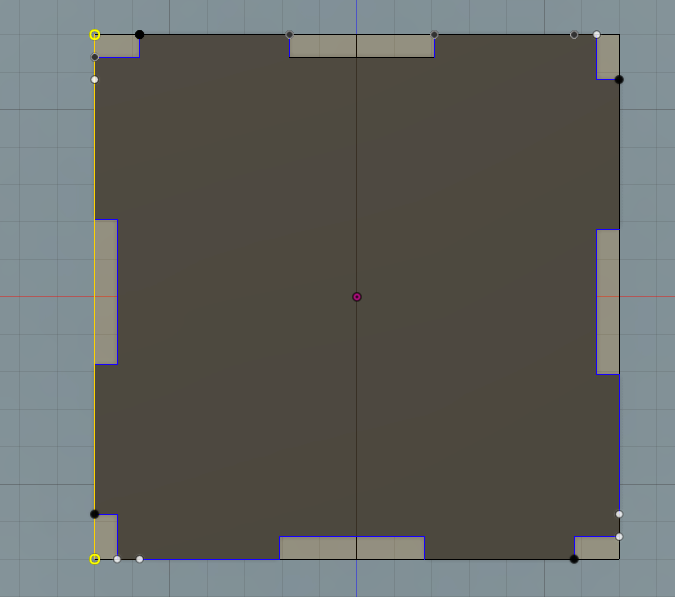
With therectangular pattern, create the 3 other sides of the box and you're done!
Modeling the box with parameters
The main advantage of Fusion 360 is the ability to drive your designthanks to parameters. In our case, we use it to define the material thickness (MDF 6 mm) and the kerf (0,145) of our material. You can add as many parameters as you want (width, length, height, angle radius…).
When you add the kerf parameter, remember that you have to divide it in half. Indeed, as the laser hits the center of the cut line, the kerf is divided between each side of this line.

The kerf is defined by the thickness of the material
Now we can create our box thanks to our parameters as we did previously. The difference appears when you enter a value. For example, you have to enter the expressionwidth + kerf to obtain the correct value.
As previously, use arectangular pattern to create the other sides of the box.
The main interest of this method is the ability to modify in seconds the design of your box thanks to the parameters. To learn more about the parametrical design, read this article on our blog.
Export to DXF and start laser cutting
Once your design is done, click on theDXF4Laser plugin in theSketch menu and follow the instructions to obtain proper DXF files for laser cutting. The plugin allows to nest each element in the workshop and to add the value of the kerf. Be careful, if you already included the kerf during the modeling process, you don't need it at this step.
Then, your DXF files can be uploaded on Sculpteo and laser cut in your favorite material.
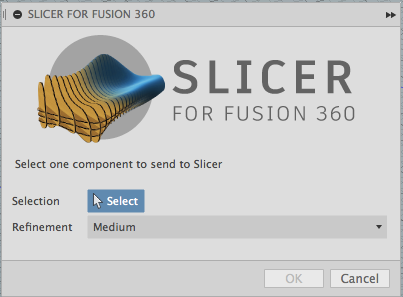
Recently, Autodesk released a plugin that turns3D models from fusion 360 into 2D files. The process is, however quite different because it slices the models for assembly thanks to built-in patterns. You can download it on the Autodesk Appstore under the nameSlicer.
To discover our laser cutting materials, please visit the material pages. If you want to learn how to prepare your files for laser cutting, you can check our tutorials on the most famous software.
Can You Do 2d Cad Drawings in Fusion
Source: https://www.sculpteo.com/en/3d-learning-hub/laser-cutting/cad-software-fusion-360-tutorial-for-lasercutting/